
Tip & Trick
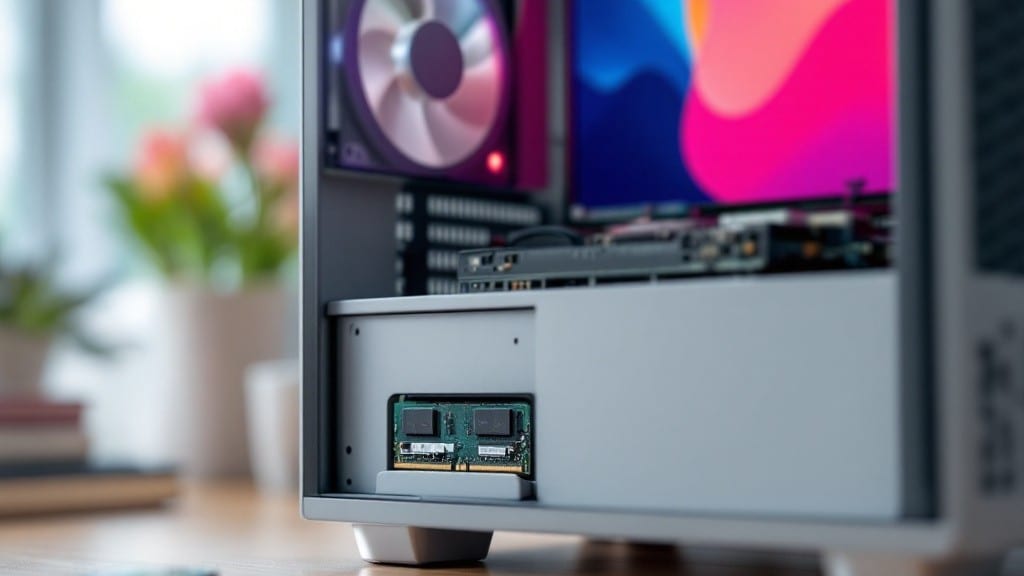
Installing RAM in a desktop PC is one of those upgrades that feels like unlocking a hidden performance boost—no soldering, no heat, just pure speed gains. ⚡ I remember the first time I popped open my uncle’s old Gateway tower in ’98 and slid in that 128MB stick; the system felt like it had been reborn.
The key is taking it slow, checking compatibility first, and treating the RAM slots like they’re made of glass (because they kinda are).
Before you even touch the screws, power down completely, unplug everything, and ground yourself—static electricity is the enemy here. You’ll need just two tools: a Phillips screwdriver and a flashlight (for those dark cases).
Match your RAM’s speed and type to your motherboard’s specs—check the manual or manufacturer’s website if you’re unsure. And here’s the golden rule: always install RAM in pairs if your motherboard has two slots, starting with the first and third slots for dual-channel setups.
Once you’ve lined up the notch on the RAM stick with the slot and pressed gently until you hear a satisfying click, you’re halfway there. The BIOS will recognize it during boot, but double-check in Windows under System Information to confirm the new capacity.
If it doesn’t show up, reseat the RAM or update your BIOS—most motherboards have a one-click update tool these days. Trust me, the first time you see that extra gigabyte light up in Task Manager is worth every second.
Pro tip: If your system won’t boot after installation, don’t panic—just reseat the RAM or try one stick at a time to rule out defects. And if you’re upgrading from 8GB to 16GB, you’ll notice games loading faster, more tabs open in your browser, and even your desktop feeling snappier.
It’s one of those upgrades where the payoff feels immediate, and the process itself is shockingly simple once you’ve done it a few times. Now go ahead—your PC’s about to get a serious memory boost.
📚 In This Guide
- What you need
- Instructions
- Tips and common mistakes
- Wrapping up and next steps
What you need
- ● RAM module(s): Check your motherboard’s manual for supported type (DDR4, DDR5), capacity (e.g., 8GB, 16GB), and speed (e.g., 3200MHz, 3600MHz). Buy a compatible kit (e.g., 2x8GB for dual-channel setups).
- ○ Anti-static wrist strap (optional but recommended): Protects your PC from static electricity. If you don’t have one, touch the metal part of your case frequently to ground yourself.
- ● Phillips-head screwdriver: For removing/reinstalling case panels and RAM clips.
- ○ Compressed air (optional): Cleans dust from your RAM slots and case before installation.
- ● Power off and unplug your PC: Safety first! Remove the power cable from the wall.
- ● Ground yourself: Avoid static by touching the case’s metal frame before handling components.
- ● Check your motherboard manual: Locate the RAM slot layout and supported configurations (e.g., "Use slots A2 & B2 for dual-channel").
Step-by-step instructions for Installing RAM in a desktop PC
Here's how to upgrade your system's memory in under 10 minutes—no tools required.
🔧 Step 1: Power Down and Ground Yourself
Turn off your desktop completely and unplug the power cable from the back. I always press and hold the power button for 5-10 seconds afterward to discharge any residual energy in the motherboard. This prevents static electricity from damaging your new RAM modules during installation.
Before touching any internal components, ground yourself by touching the metal chassis of your case. This simple step helps avoid static buildup that could potentially harm sensitive electronics. Keep your workspace well-lit and free of clutter so you can see the RAM slots clearly.
⚡ Step 2: Locate and Prepare the RAM Slots
Open your case by removing the side panel screws—most cases use 2-4 thumbscrews along the bottom edge. Slide the panel off carefully and set it aside. The RAM slots are typically located near the CPU, often marked as DIMM slots on the motherboard.
Look for small plastic clips on either end of the slots. These clips should be in an upright position—if they're down, press them outward to open the slot. The slots are keyed to prevent incorrect insertion, so you'll only be able to insert the RAM modules one way. If your motherboard has dual-channel support, align matching modules in slots A2 and B2 for optimal performance.
🖥️ Step 3: Align and Insert the RAM Modules
Take your RAM module and align the notch on the bottom edge with the corresponding tab in the slot. Apply gentle, even pressure downward—you'll feel and hear a satisfying click as the module snaps into place and the clips close automatically. Don't force it; if it doesn't go in smoothly, you've likely got it oriented wrong.
For systems requiring two modules, insert the second module into the corresponding slot (usually the mirror position). If you're unsure which slots to use, consult your motherboard manual—most modern boards support up to 128GB when using all four slots with compatible modules. The clips should stay securely closed after insertion.
💡 Step 4: Secure the Case and Power Up
Once all RAM modules are properly seated, gently press down on the top edges to ensure they remain firmly in place. Reattach the side panel of your case, securing it with the screws you removed earlier. Make sure the panel sits flush against the case to maintain proper airflow and prevent dust buildup.
Plug the power cable back into your desktop and turn it on. Listen for any beeps from the motherboard—most systems will emit a single beep to indicate successful POST (Power-On Self-Test). If you hear multiple beeps or no beep at all, power down immediately and reseat the RAM modules.
⏰ Step 5: Verify Installation in BIOS and OS
Enter your system's BIOS or UEFI setup (usually by pressing Del, F2, or F12 during boot). Navigate to the Memory or System Information section to confirm your new RAM capacity is detected. If the BIOS shows the correct amount but Windows doesn't recognize it, restart your computer and check again.
In Windows, open Task Manager (Ctrl+Shift+Esc) and go to the Performance tab. Under Memory, you should see your total installed RAM reflected. If you're still not seeing the full capacity, restart once more—sometimes Windows needs a second boot to fully recognize new hardware. Run a quick benchmark using Windows Memory Diagnostic to ensure everything's functioning properly.
Tips & tricks for Installing RAM in a desktop PC
These simple tricks will help you avoid the most common mistakes and make your 10-minute RAM upgrade go even smoother than expected.
Static Protection is Non-Negotiable: I can't stress this enough—static electricity is the silent killer of RAM modules. Beyond grounding yourself by touching the metal case, consider using an anti-static wrist strap if you're working in a dry environment. Even a small static discharge can damage your new RAM, and most warranties won't cover static-related failures. If you don't have a strap, just work quickly and avoid walking across carpets before touching components.
Slot Identification Shortcut: Most motherboards have the RAM slots clearly marked with numbers (like A1, A2, B1, B2). If yours doesn't, look for the tiny gold connectors—they're keyed to prevent incorrect insertion. For dual-channel setups, always install matching RAM modules in slots A2 and B2 (or whatever your manual specifies). I've seen people waste 20 minutes trying to force RAM into the wrong slot before realizing it was just oriented incorrectly.
The 10-Minute Rule: That 10-minute estimate in the instructions assumes you're prepared. Have your RAM modules, a Phillips screwdriver (if needed), and your manual open before you start. I've seen people spend twice as long hunting for tools or reading the manual while their case is open. Keep your workspace organized—place screws in a safe spot and don't let them roll away during installation. The clock starts when you unplug your PC!
Visual Confirmation is Key: After inserting your RAM modules, give them a gentle downward press to ensure they're fully seated. The clips should be closed and flush with the slot. Look through the side of the case—you should see the gold connectors make full contact with the RAM. If you're unsure, gently wiggle the RAM slightly; if it moves, it's not properly inserted. This simple check prevents 90% of installation issues.
Pro Tips for Install Ram In A Desktop Pc
- These simple tricks will help you avoid the most common mistakes and make your 10-minute RAM upgrade go even smoother than expected.
- Static Protection is Non-Negotiable: I can't stress this enough—static electricity is the silent killer of RAM modules.
- Slot Identification Shortcut: Most motherboards have the RAM slots clearly marked with numbers (like A1, A2, B1, B2).
Frequently asked questions
Got questions about upgrading your RAM? Here are answers to the most common concerns—so you can tackle this upgrade with confidence!
Do I need to turn off my PC to install RAM?
Always power down your PC and unplug it before opening the case. Static electricity can damage RAM modules, and safety first means no surprises. Ground yourself by touching the case (or use an anti-static wrist strap) for extra protection.
Can I mix different RAM brands or speeds?
You can, but it’s not always ideal. Mixing brands is fine if they’re compatible (check your motherboard’s specs), but mixing speeds or latencies can cause instability. For best performance, stick to identical kits. If you must mix, run the slower speed or use the XMP/DOCP profile in BIOS.
How do I know if my RAM is installed correctly?
Start with these checks:
- Physical fit: RAM should click into place with a satisfying snick—no wiggling!
- BIOS recognition: Boot into BIOS (usually Del or F2) and confirm the new RAM is detected.
- Windows update: Open Task Manager > Performance to see if the RAM is registered.
What if my motherboard only has 2 slots but I want 4GB RAM?
No problem! Most motherboards support dual-channel mode for better performance, but you can still use a single stick. Just install it in the 1st or 3rd slot (check your manual for slot pairing). For 4GB, use a single 4GB stick or two 2GB sticks (if your slots support it).
My PC won’t boot after installing RAM—what now?
Stay calm! Try these fixes:
- Reseat the RAM firmly in the slots.
- Test one stick at a time in Slot 1 or 3 (if paired).
- Clear CMOS by removing the CMOS battery for 10 seconds or using the jumper.
- Check for bent pins on the RAM or motherboard slot.
Wrapping up and next steps
You’ve just taken a big step toward boosting your PC’s performance—congratulations! 🎉 Installing RAM might seem intimidating at first, but with the right tools and patience, it’s a straightforward upgrade that can make a huge difference in speed and multitasking.
Now that you’re equipped with the knowledge, why not explore even more upgrades?
Ready for the next level? Consider adding more storage (like an SSD) or upgrading your graphics card to keep your system running smoother than ever. Your gaming, editing, or browsing experience will thank you!